Sketcher Micro Tutorial - Constraint Practices/pt-br
| Topic |
|---|
| Sketcher |
| Level |
| Iniciante |
| Time to complete |
| 30 minutos |
| Authors |
| Mark Stephen (Quick61) e vocx |
| FreeCAD version |
| 0.19 |
| Example files |
| Sketcher Constraints practices |
| See also |
| None |
Introdução
Este tutorial foi originalmente escrito por Quick61, e reescrito e reilustrado por vocx.
Este tutorial foi composto para ajudar o novo usuário a se familiarizar com as melhores práticas de restrição de esboço no fluxo de trabalho da Sketcher Workbench.
Existe uma regra geral para as restrições: quanto menor a quantidade de restrições de dados (cotas ou dimensões), melhor.
É preferível usar uma restrição geométrica em vez de uma dimensional, se possível. Isso tem a ver com o funcionamento interno do solucionador de restrições do Sketcher.
Configuração
1. Abra o FreeCAD, crie um novo documento em branco com Arquivo → Novo.
- 1.1. Switch to the Sketcher Workbench from the workbench selector, or the menu View → Workbench → Sketcher.
Some actions to remember:
- Press the right mouse button, or press Esc in the keyboard once, to deselect the active tool in edit mode.
- To exit the sketch edit mode, press the Close button in the task panel, or press Esc twice in the keyboard.
- To enter again edit mode, double click on the sketch in the tree view, or select it, and then click on
Edit Sketch.
Crie um Esboço
2. Click on New Sketch.
- 2.1. Choose the sketch orientation, that is, one of the base XY-, XZ-, or YZ-planes. We will use the default plane and options.
- 2.2. Click OK to start constructing the sketch.
Note: in the task panel expand the Sketch Edit section and in its
settings menu turn off grid snap and the display of the grid. Also expand the Constraints section and in its
settings menu turn off Auto constraints.
Primeira Abordagem: Restrições de Referência
3. We will draw a fully constrained square, centered at the origin.
- 3.1. Click on
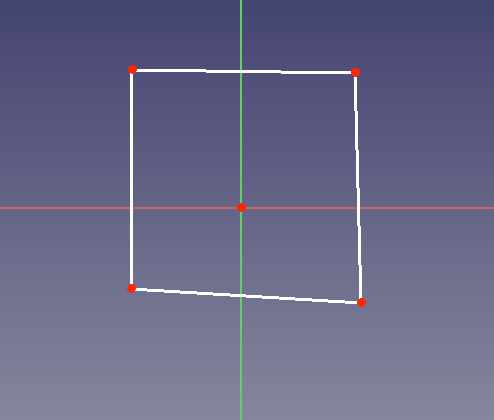
Polyline, then trace four lines in the general shape of a rectangle around the origin.
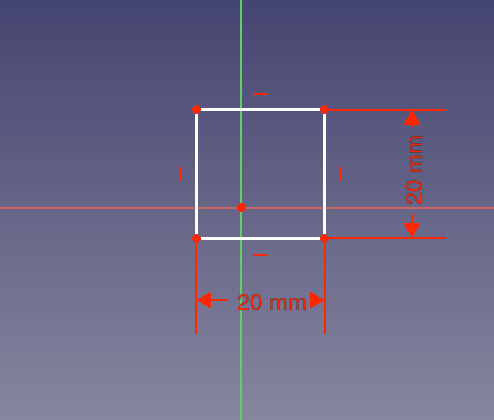
Unconstrained rectangular sketch.
- 3.2. Select one horizontal line, and press
Horizontal Dimension, then enter
20 mm. - 3.3. Select the other horizontal line, and repeat the constraint with the same dimension.
- 3.4. Select one vertical line, and press
Vertical Dimension, then enter
20 mm. - 3.5. Select the other vertical line, and repeat the constraint with the same dimension.
- 3.6. Select one bottom corner point (a), and the origin of the sketch, and press
Horizontal Dimension, then enter
10 mm. - 3.7. Select the top corner point (b) above the previous corner point (a), and the origin of the sketch, and repeat the constraint with the same dimension.
- 3.8. Select the other bottom corner point (c), and the origin of the sketch, and press
Vertical Dimension, then enter
10 mm. - 3.9. Select the top corner point (b) again, and the origin of the sketch, and repeat the constraint with the same dimension.
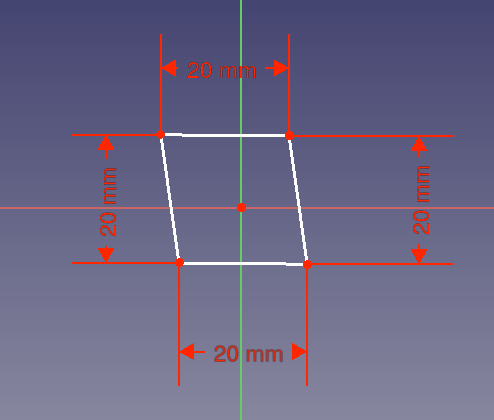
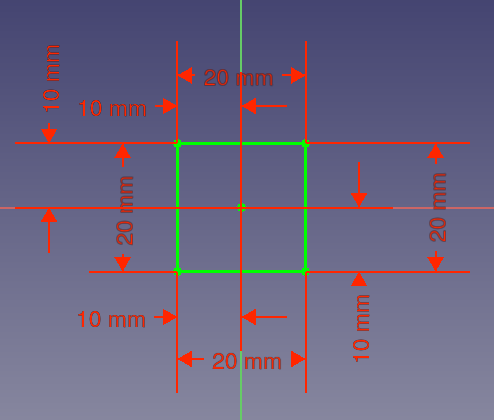
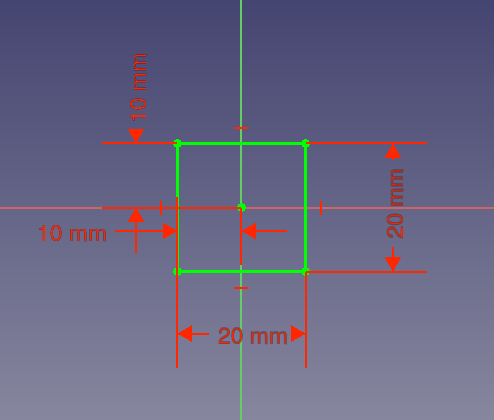
Left: datum constraints for the sides. Right: additional datum constraints for the interior dimensions.
Looking at the Constraints section in the task panel, we see that the constraints are too many; they also clutter the view of the sketch. These constraints are also computationally intensive for the solver; while this is not an issue with a simple shape, it can become one with more complex shapes.
Uma Maneira Melhor: Referência e Restrições Geométricas
4. We will draw the same square fully constrained, and centered at the origin. When you create the new sketch, make sure the Auto constraints option is disabled.
- 4.1. Click on
Polyline, then trace four lines in the general shape of a rectangle around the origin.
- 4.2. Select one horizontal line, and press
Horizontal Constraint.
- 4.3. Select the other horizontal line, and repeat the constraint.
- 4.4. Select one vertical line, and press
Vertical Constraint.
- 4.5. Select the other vertical line, and repeat the constraint.
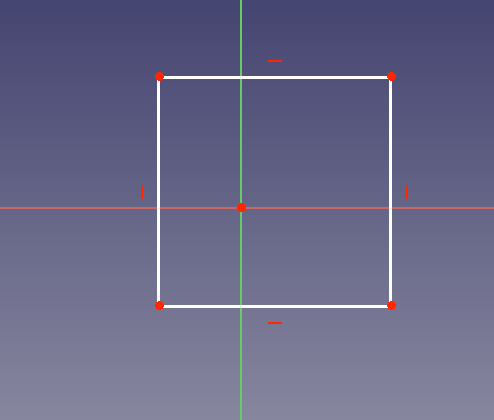
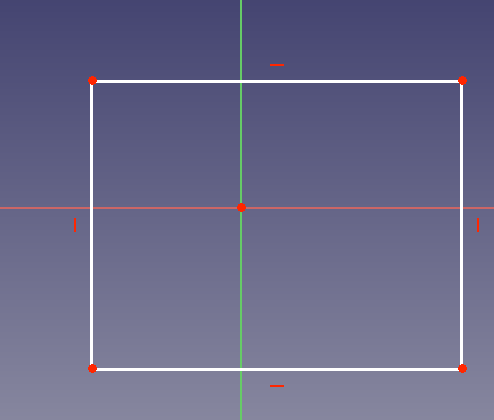
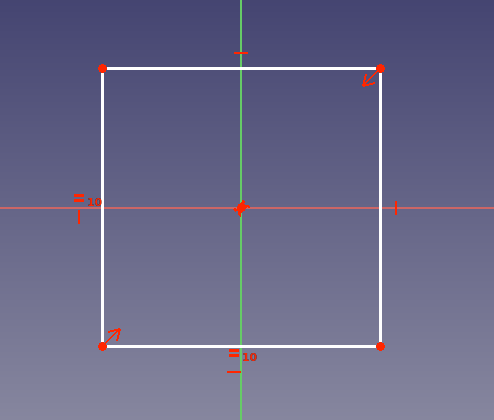
Geometrical horizontal and vertical constraints.
- 4.6. Select one horizontal line, and press
Horizontal Dimension, then enter
20 mm. We see that the other horizontal line changes size at the same time. - 4.7. Select one vertical line, and press
Vertical Dimension, then enter
20 mm. We see that the other vertical line changes size at the same time. - 4.8. Select one bottom corner point (a), and the origin of the sketch, and press
Horizontal Dimension, then enter
10 mm. - 4.9. Select the top corner point (b) above the previous corner point (a), and the origin of the sketch, and press
Vertical Dimension, then enter
10 mm.
Left: datum constraints for only two sides. Right: additional datum constraints for only two interior dimensions.
This is a better constrained sketch than the first one. The horizontal and vertical geometric constraints allow us to use fewer datum constraints, so our sketch looks less cluttered.
Esquema Ótimo: Principalmente Restrições Geométricas
5. We will draw the same square fully constrained, and centered at the origin. When you create the new sketch, make sure the Auto constraints option is disabled.
- 5.1. Click on
Polyline, then trace four lines in the general shape of a rectangle around the origin.
- 5.2. Select one horizontal line, and press
Horizontal Constraint.
- 5.3. Select the other horizontal line, and repeat the constraint.
- 5.4. Select one vertical line, and press
Vertical Constraint.
- 5.5. Select the other vertical line, and repeat the constraint.
Geometrical horizontal and vertical constraints.
- 5.6. Select one bottom corner point (a), then the top corner point that is diagonally opposite, and then the origin of the sketch; then press
Symmetric Constraint. The two selected points will be equidistant from the origin.
- 5.7. Select two adjacent sides of the rectangle (connected at one corner), and press
Equal Constrain. Notice that due to the symmetry of the corner points, all sides are now of the same size.
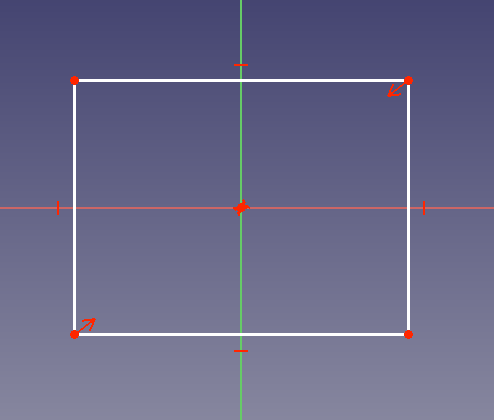
Left: symmetric constraint for only two corner points. Right: additional equal constraint for only two adjacent sides.
- 5.8. Select one horizontal line, and press
Horizontal Dimension, then enter
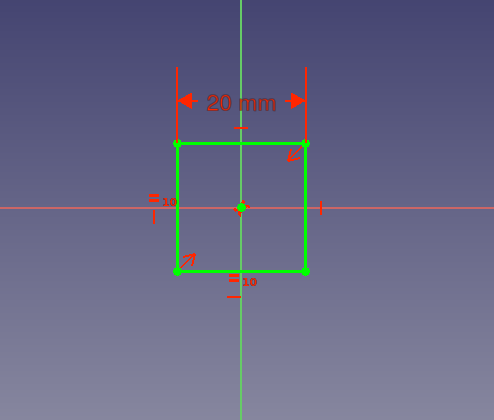
20 mm. Due to the symmetric and equal constraints previously added, we see that all sides become equal at the same time.
All geometric constraints applied, and a single datum constraint for a side.
This is the best way to constrain this sketch, as we only used one datum (dimensional) constraint.
Recursos Adicionais
- General: New Sketch, Edit Sketch, Attach Sketch, Reorient Sketch, Validate Sketch, Merge Sketches, Mirror Sketch, Leave Sketch, Align View to Sketch, Toggle Section View, Toggle Grid, Toggle Snap, Rendering Order, Stop Operation
- Geometries: Point, Polyline, Line, Arc From Center, Arc From 3 Points, Elliptical Arc, Hyperbolic Arc, Parabolic Arc, Circle From Center, Circle From 3 Points, Ellipse From Center, Ellipse From 3 Points, Rectangle, Centered Rectangle, Rounded Rectangle, Triangle, Square, Pentagon, Hexagon, Heptagon, Octagon, Polygon, Slot, Arc Slot, B-Spline, Periodic B-Spline, B-Spline From Knots, Periodic B-Spline From Knots, Toggle Construction Geometry
- Constraints:
- Dimensional Constraints: Dimension, Horizontal Dimension, Vertical Dimension, Distance Dimension, Radius/Diameter Dimension, Radius Dimension, Diameter Dimension, Angle Dimension, Lock Position
- Geometric Constraints: Coincident Constraint (Unified), Coincident Constraint, Point-On-Object Constraint, Horizontal/Vertical Constraint, Horizontal Constraint, Vertical Constraint, Parallel Constraint, Perpendicular Constraint, Tangent/Collinear Constraint, Equal Constraint, Symmetric Constraint, Block Constraint, Refraction Constraint
- Constraint Tools: Toggle Driving/Reference Constraints, Toggle Constraints
- Sketcher Tools: Fillet, Chamfer, Trim Edge, Split Edge, Extend Edge, External Projection, External Intersection, Carbon Copy, Select Origin, Select Horizontal Axis, Select Vertical Axis, Move/Array Transform, Rotate/Polar Transform, Scale, Offset, Mirror, Remove Axes Alignment, Delete All Geometry, Delete All Constraints, Copy Elements, Cut Elements, Paste Elements
- B-Spline Tools: Geometry to B-Spline, Increase B-Spline Degree, Decrease B-Spline Degree, Increase Knot Multiplicity, Decrease Knot Multiplicity, Insert Knot, Join Curves
- Visual Helpers: Select Under-Constrained Elements, Select Associated Constraints, Select Associated Geometry, Select Redundant Constraints, Select Conflicting Constraints, Toggle Circular Helper for Arcs, Toggle B-Spline Degree, Toggle B-Spline Control Polygon, Toggle B-Spline Curvature Comb, Toggle B-Spline Knot Multiplicity, Toggle B-Spline Control Point Weight, Toggle Internal Geometry, Switch Virtual Space
- Additional: Sketcher Dialog, Preferences, Sketcher scripting
- Getting started
- Installation: Download, Windows, Linux, Mac, Additional components, Docker, AppImage, Ubuntu Snap
- Basics: About FreeCAD, Interface, Mouse navigation, Selection methods, Object name, Preferences, Workbenches, Document structure, Properties, Help FreeCAD, Donate
- Help: Tutorials, Video tutorials
- Workbenches: Std Base, Assembly, BIM, CAM, Draft, FEM, Inspection, Material, Mesh, OpenSCAD, Part, PartDesign, Points, Reverse Engineering, Robot, Sketcher, Spreadsheet, Surface, TechDraw, Test Framework
- Hubs: User hub, Power users hub, Developer hub
