Macro Cut Object For Magnets
| Description |
|---|
| Cut an object along a plane and add aligned magnet holes with surface collision detection. Creates two parts with perfectly aligned holes for embedding magnets that allow the parts to snap together. Macro version: 0.6.2 Last modified: 2026-01-18 FreeCAD version: 0.21+ Download: ToolBar Icon Author: Spkane |
| Author |
| Spkane |
| Download |
| ToolBar Icon |
| Links |
| Macros recipes How to install macros How to customize toolbars |
| Macro Version |
| 0.6.2 |
| Date last modified |
| 2026-01-18 |
| FreeCAD Version(s) |
| 0.21+ |
| Default shortcut |
| None |
| See also |
| Part Slice, PartDesign Hole |
Description
This macro cuts a 3D object along a specified plane and automatically adds aligned magnet holes to both resulting pieces. The holes are positioned with intelligent collision detection to ensure they don't break through the outer walls of the object.
This is particularly useful for:
- Creating multi-part prints that snap together with embedded magnets.
- Splitting large objects for smaller 3D printer beds while maintaining alignment.
- Adding magnetic closure mechanisms to enclosures and cases.
Key Features:
- Cut along preset planes (XY, XZ, YZ) or model datum planes.
- Automatic hole placement with even distribution along the cut edge.
- Surface collision detection prevents holes from breaking through walls.
- Configurable hole diameter, depth, and count.
- Preferred and minimum edge clearance settings.
- Smart repositioning of holes when initial placement fails safety checks.
- Creates PartDesign::Body objects with parametric Hole features.
- Supports re-cutting already-cut objects (preserves existing holes).
- Automatically separates the two parts for easy viewing.
Usage
- Open a document with the object you want to cut.
- Optionally select the object and/or a datum plane before running the macro.
- Run the macro from Macro → Macros → CutObjectForMagnets → Execute.
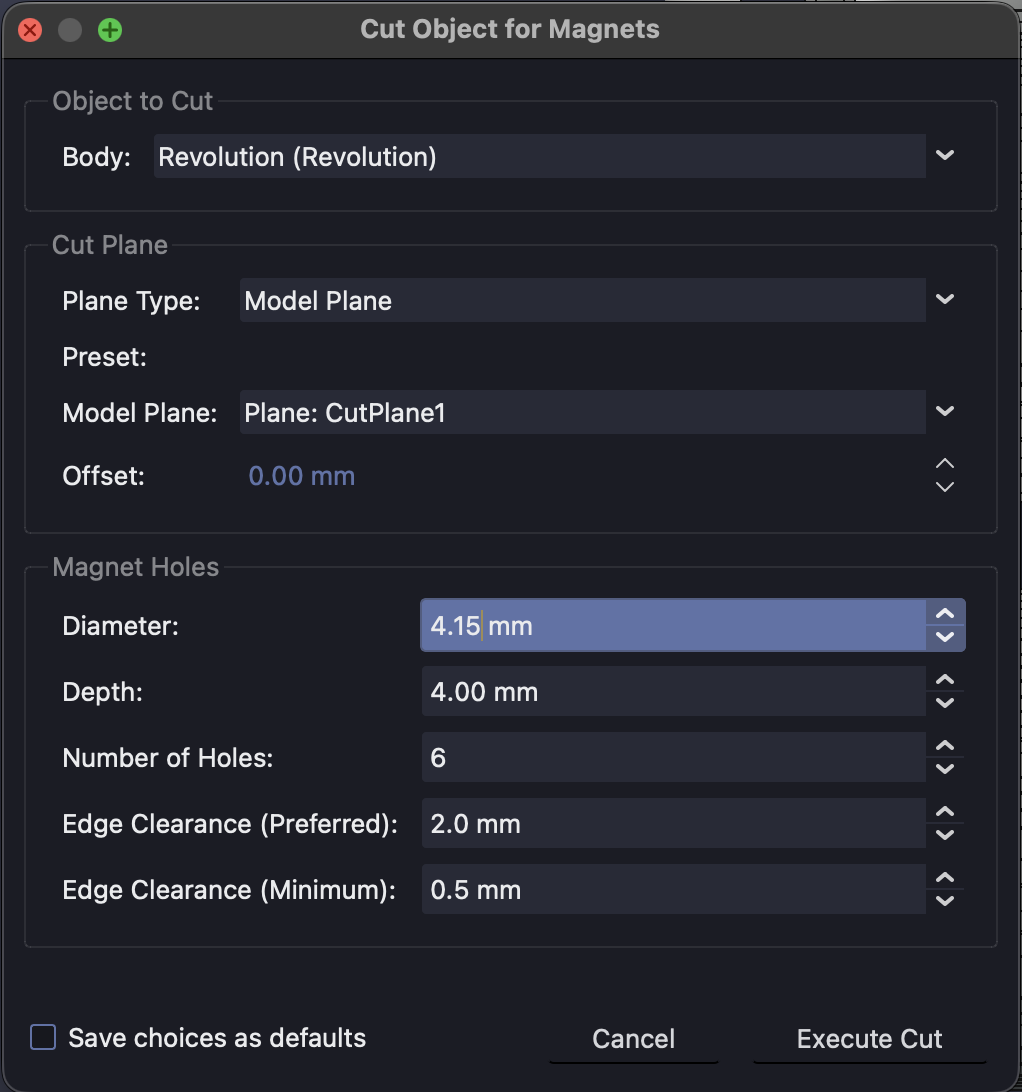
- In the dialog:
- Select the body to cut from the dropdown.
- Choose the cut plane type (Preset or Model Plane).
- For preset planes, set the offset from origin.
- Configure magnet hole parameters:
- Diameter: Hole diameter (should match your magnet size).
- Depth: Hole depth from cut surface.
- Number of Holes: Total holes to create.
- Edge Clearance (Preferred): Ideal distance from hole edge to object surface.
- Edge Clearance (Minimum): Minimum acceptable clearance.
- Click "Execute Cut".

Example
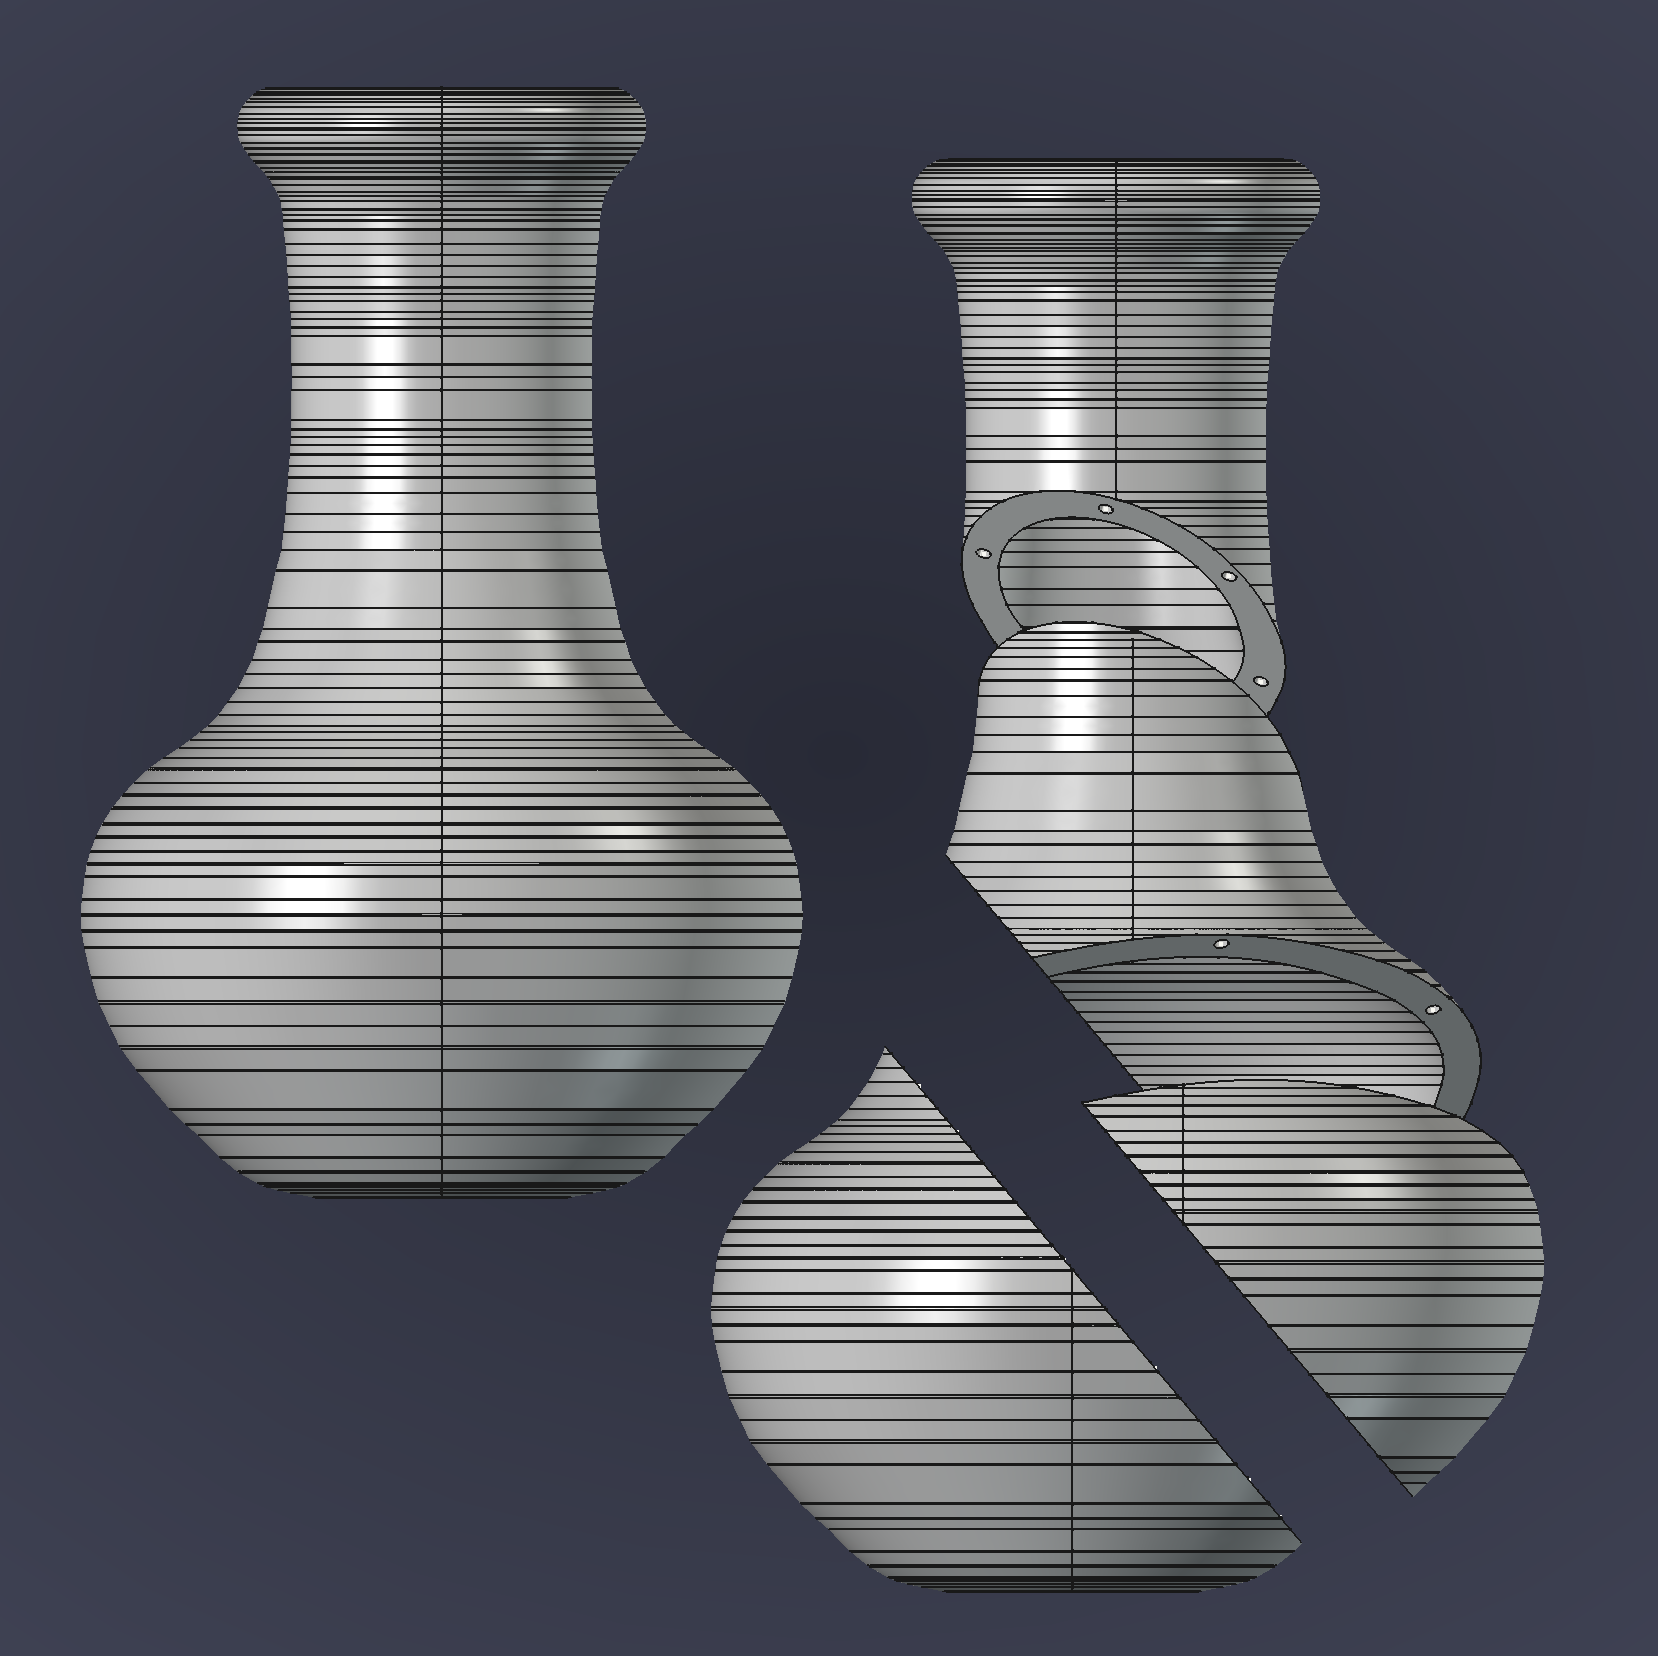
This image shows a vase object in its original form, and after being cut multiple times with the macro. Magnets can then be inserted into the object, and the object can be re-assembled. This example was to create a "breakable" vase for a theatrical stage performance, but there are many other potential uses as well.

How It Works
Cutting Process:
- Creates a large half-space box aligned with the cutting plane.
- Uses boolean operations to split the object into two parts.
- Creates PartDesign::Body containers for each half.
Hole Placement Algorithm:
- Calculates hole positions evenly distributed along the cut face perimeter.
- For each position, validates against BOTH parts (not just one).
- Uses preferred clearance first, falls back to minimum if needed.
- Checks for hole-to-hole spacing (minimum 2x diameter).
- Repositions holes that fail safety checks using multiple strategies:
- Reduced clearance at same position.
- Increased inset from edge.
- Alternative positions along the perimeter.
Safety Features:
- Creates test cylinders to check if holes would break through walls.
- Validates each hole against both the top and bottom parts.
- Skips holes that cannot be safely placed.
- Reports repositioned and skipped holes in the console.
Parameters
| Parameter | Description | Default |
|---|---|---|
| Plane Type | "Preset Plane" (XY/XZ/YZ) or "Model Plane" (datum plane) | Preset Plane |
| Offset | Distance from origin for preset planes | 0 mm |
| Diameter | Magnet hole diameter | 3 mm |
| Depth | Hole depth from cut surface | 3 mm |
| Number of Holes | Total holes to create | 6 |
| Edge Clearance (Preferred) | Ideal distance from hole edge to object surface | 2 mm |
| Edge Clearance (Minimum) | Minimum acceptable clearance (used during repositioning) | 0.5 mm |
Requirements
- FreeCAD 0.19 or later.
- An object with a solid shape (Part or PartDesign body).
- For model plane mode: a datum plane or object with planar faces.
Installation
- Install via the FreeCAD Addon manager or manually from the freecad-macro-cut-for-magnets repo on GitHub.
Tips
- Magnet sizing: Measure your magnets carefully. Common sizes are 3mm, 5mm, and 6mm diameter.
- Add tolerance: Consider adding 0.1-0.2mm to the diameter for easier magnet insertion.
- Depth planning: Set hole depth slightly deeper than magnet height to ensure flush or recessed fit.
- Edge clearance: For thin-walled objects, reduce the preferred clearance but keep minimum clearance high enough to prevent wall breakthrough.
- Re-cutting: The macro detects existing magnet holes and preserves them when cutting already-cut parts.
Source Code
The full source code is hosted on GitHub:
Links
- Full Documentation - Complete guides and tutorials.
- GitHub Repository - Source code and issue tracker.
- Part Slice - FreeCAD's built-in slice tool.
- PartDesign Hole - Parametric hole feature documentation.
- PartDesign Body - Body container documentation.