Bevel Gears
| Topic |
|---|
| Creating a bevel gear pair |
| Level |
| Advanced |
| Time to complete |
| TBD |
| Authors |
| FBXL5 |
| FreeCAD version |
| 1.1 |
| Example files |
| None |
| See also |
| Gear Workbench |
Introduction
The Bevel Gears tutorial describes how to gather the required data to create a pair of bevel gears with the BevelGear tool of the
Gear Workbench in a
PartDesign context.
A pair of bevel gears meshing
A bevel gear can either be build up from the pitch circle or from the (pitch) apex, its virtual tip, depending on its property reset_origin. In later steps in this tutorial we have to scale the bevel gear while keeping its apex in place and so we will uncheck this property.
Requirements
The BevelGear tool creates a bevel gear for perpendicular axes and a ratio of 1 : 1 by default. For other angles between their axes, better known as shaft angles, and different ratios we need to determine the proper pitch cone angle for both of the paired bevel gears. In addition we have to adjust basic values and derive the pitch diameters.
Basic Values
Assumed that we tortured our brain to consider available space, loads, ratio, and shaft angle and now have found these basic values:
- Module:
- Ratio:
- Shaft angle:
Number of Teeth
To not overload our CPUs we will set the number of teeth (z) of the smaller gear to only 9 and so the number of teeth of the larger one is set to 15 ( equals ).
- (for bevel gear 1)
- (for bevel gear 2)
Pitch Diameter
Now we can calculate the pitch diameters (d):
Cone Angles
Now it is FreeCAD's turn to find the pitch cone angles (δ):
- Create a
new document.
- Create a
Body (Body).
- Create a
Sketch.
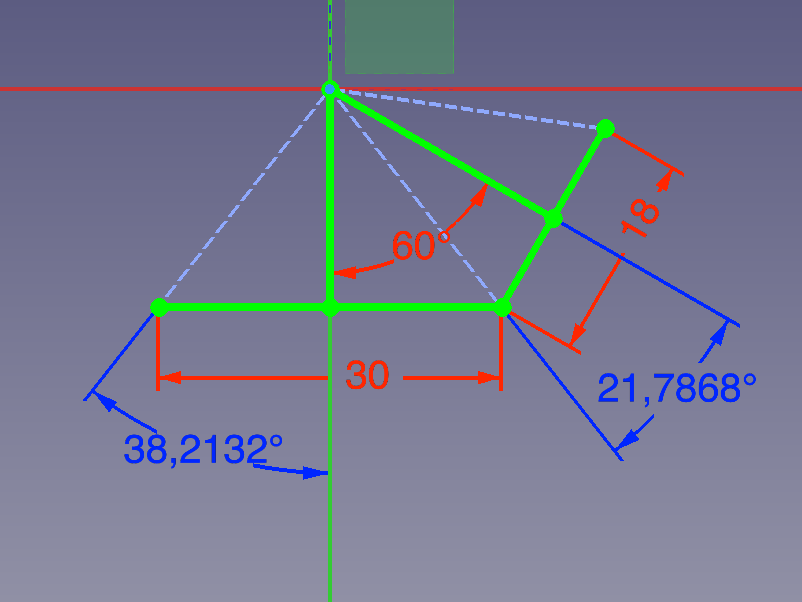
We use the sketch to draft 2 connected triangles with their symmetry axes perpendicular to the sides representing the pitch diameters. Apart from several hidden coincident and symmetry constraints we use two length constraints for the pitch diameters and an angle constraint for the shaft angle to fully constrain the sketch, then we are able to use two reference constraints to obtain both pitch cone angles (and leave the sketch):
Red: Constrained shaft angle, and both pitch diameters.
Blue: Resulting pitch cone angles
We now have the pitch cone angles:
Raw Gears
We are ready to create our pair of bevel gears.
Bevel Gear 1
- Create a new
PartDesign Body (Body001).
- Invoke the
BevelGear command.
- A bevel gear (BevelGear) is created immediately with its pitch diameter side touching the origin, and awaiting adjustment.
- In the Property View adjust these properties of the bevel gear:
- Set the Datamodule property to
2 mm. - Set the Datanum_teeth property to
15. - Set the Datapitch_angle property to
38.21°(two decimal places should be more than enough). - Uncheck the Datareset_origin property to place the bevel gear's apex on the origin (this will turn the bevel gear upside down).
- Set the Datamodule property to
- Use
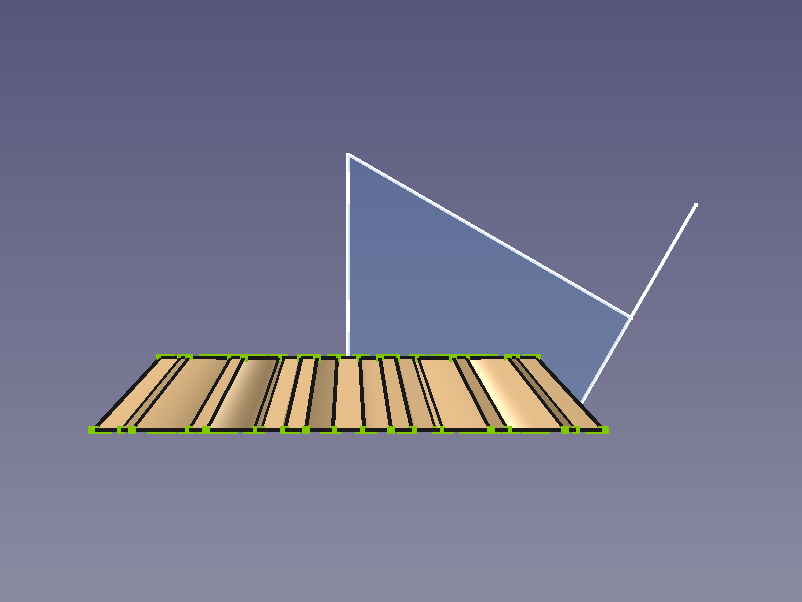
Transform to swivel the bevel gear around the origin so that its face on the pitch circle side is parallel to the horizontal line of the sketch representing the same pitch circle of the larger gear (if we filled in the values properly the line should be coplanar with the face).
Bevel gear 1 properly positioned
Bevel Gear 2
- Create another new
PartDesign Body (Body002).
- Invoke the
BevelGear command.
- A bevel gear (BevelGear002) is created.
- In the Property View adjust these properties of the bevel gear:
- Set the Datamodule property to
2 mm. - Set the Datanum_teeth property to
9. - Set the Datapitch_angle property to
21.79°. - Uncheck the Datareset_origin property to place the bevel gear's apex on the origin (this will turn the bevel gear upside down).
- Set the Datamodule property to
- Use
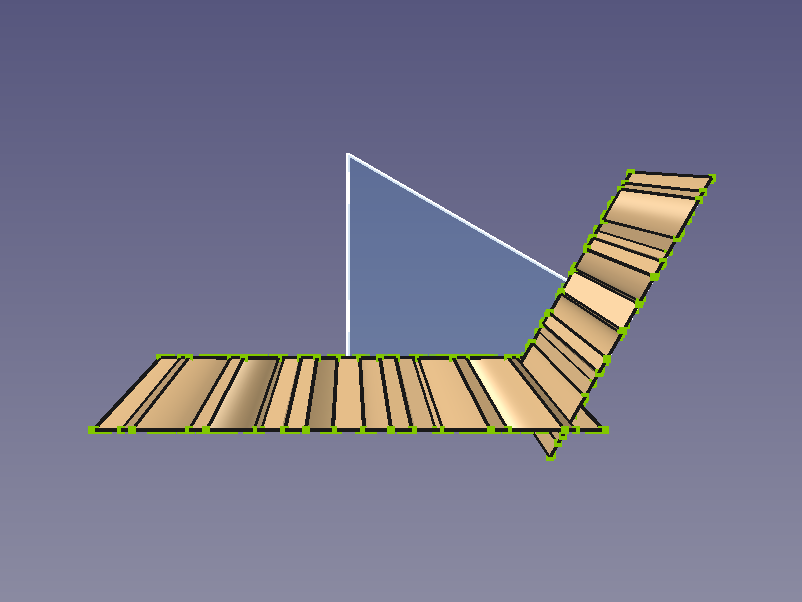
Transform to swivel the bevel gear around the origin so that its face on the pitch circle side is parallel to the oblique line of the sketch representing the same pitch circle of the smaller gear (if we filled in the values properly the line should again be coplanar with the face).
Bevel gear 2 properly positioned
At this point both bevel gears should mesh with each other where their pitch cones meet in the initial sketch, but their shapes don't look like real bevel gears.
Meshing raw bevel gears
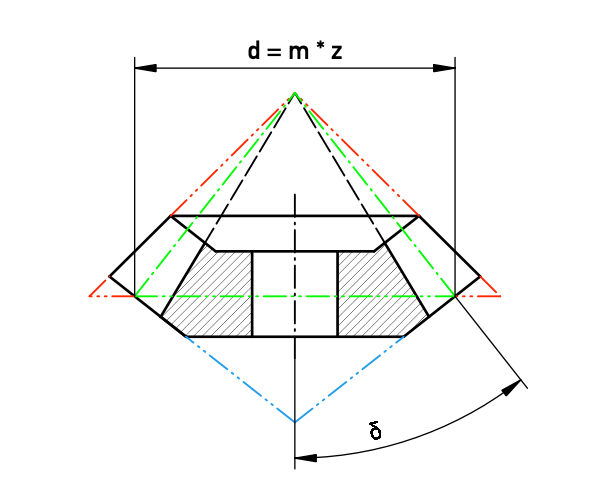
We notice that the BevelGear tool extended the pitch cone to become the face cone before cutting the teeth, but it has only built the bevel gear from the pitch circle toward the apex (the virtual tip), and ignored the back cone geometry in the opposite direction as shown in this section view of the finished bevel gear:
Green: Pitch cone,
Red: Face cone.
Blue: Back cone
To obtain a proper bevel gear we have to enlarge our raw bevel gears and cut off surplus geometry, but instead of cutting off we will intersect revolution objects defining the cross-sections with our to be enlarged raw bevel gears.
Intersection Objects
We have to define the desired cross-sections from their axes outwards, and then revolve them to create objects that will be intersected with the results of the steps above to result in a proper pair of bevel gears.
Revolution Object 1
- Activate the first body (Body).
- Create another
sketch, and in the sketch:
- Project the lines representing the pitch diameters of our first sketch into our new sketch.
- Draw a construction line from their intersection point to the origin. (it is where the pitch cones meet, and its length is called cone distance).
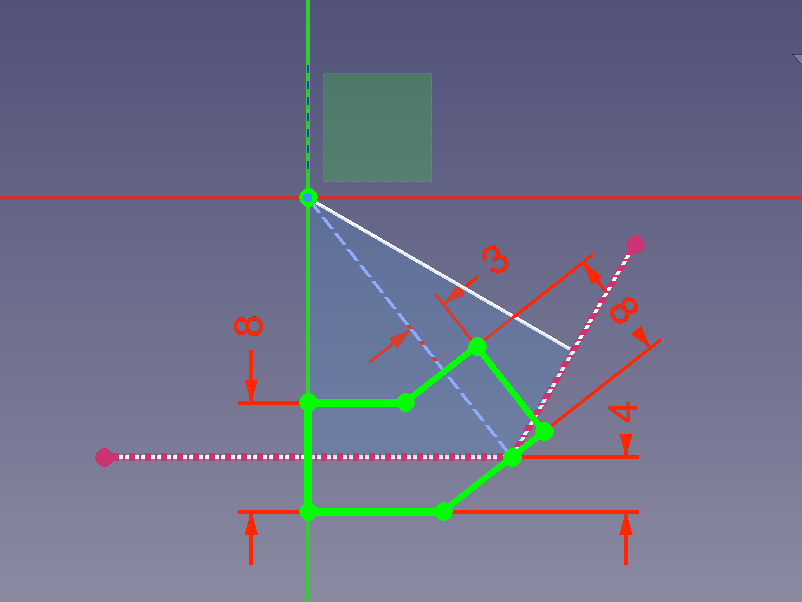
- We need a closed wire of six straight lines:
- Draw one line collinear with the vertical sketch axis.
- Draw two lines parallel to the horizontal projection line to define position and thickness of the hub area.
- Draw two lines perpendicular to the construction line to define the width of the teeth, one is running through the intersection point and also defines the back cone.
- Draw one line closing the wire that is only required to run outside the raw bevel gear since that already has a correctly modeled teeth hight.
- Leave the sketch.
- Create another new
PartDesign Body (Body003).
- Use a
Sub-Shape Binder to copy the sketch into the body.
- Create a
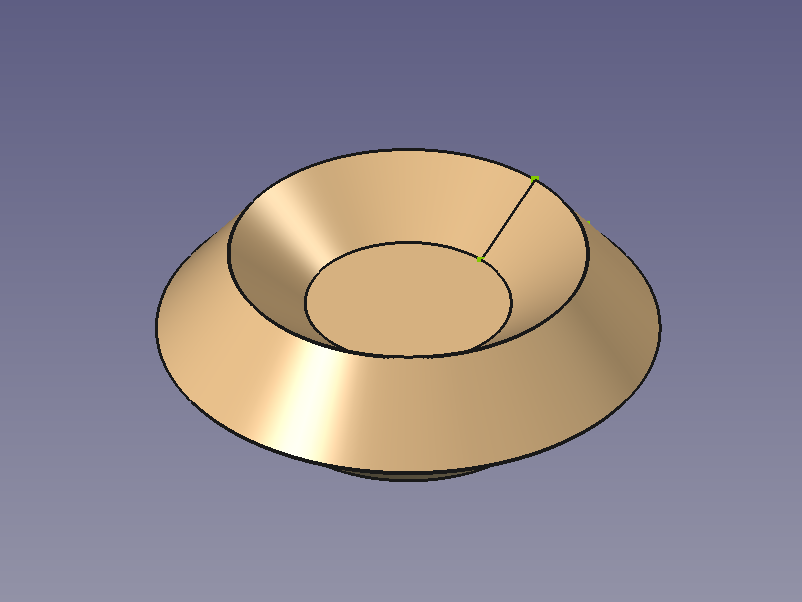
Revolve object (Revolution) from the sub-shape binder.
Left: Sketch of cross-section. Right: Resulting Revolution object 1
The width of the teeth (also called face width) is usually roughly one third of the cone distance (24.25° in this case), thus 8 mm was chosen for this example.
Revolution Object 2
- Activate the first body (Body) again.
- Create another
sketch, and in the sketch:
- Project the lines representing the pitch diameters, and also the line representing the axis of our smaller bevel gear from our first sketch into our new sketch.
- Draw a construction line from their intersection point of the pitch diameters to the origin.
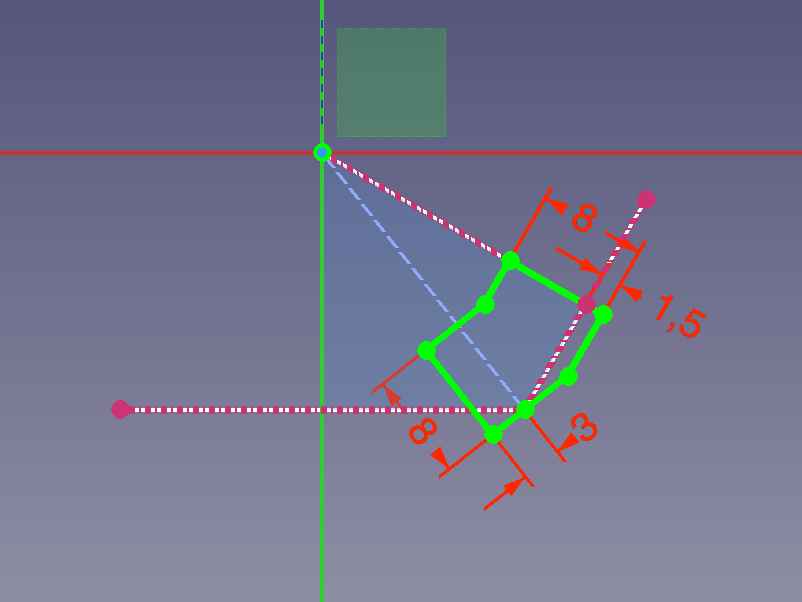
- We need a closed wire of six straight lines:
- Draw one line collinear with the projected axis.
- Draw two lines parallel to the oblique projected pitch diameter to define position and thickness of the hub area.
- Draw two lines perpendicular to the construction line to define the width of the teeth, one is running through the intersection point and also defines the back cone.
- Draw one line closing the wire that is only required to run outside the raw bevel gear since it already has a correctly modeled teeth hight.
- Leave the sketch.
- Create another new
PartDesign Body (Body004)..
- Use a
Sub-Shape Binder to copy the sketch into the body.
- Create a
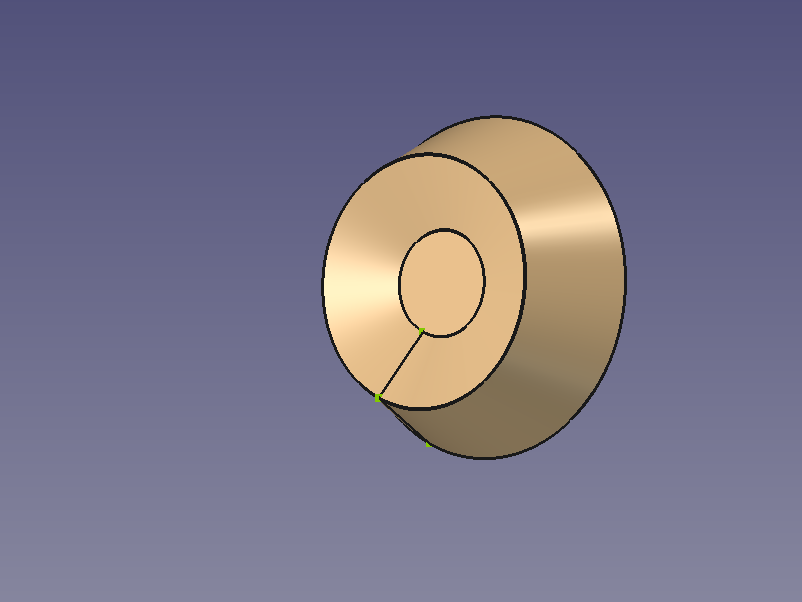
Revolve object (Revolution001) from the sub-shape binder.
Left: Sketch of cross-section. Right: Resulting Revolution object 2
Finished Bevel Gears
Now we will intersect the raw bevel gears with the revolution objects to find their common shapes. Having hidden all objects but our raw bevel gears and revolution objects, we will notice that the gears do not protrude enough from the revolution object. Since we built the bevel gears from the apex we can (mis-) use the module value to "scale" the gear and adjust its height before intersecting.
Bevel Gear 1
- Activate bevel gear 1 (Body001).
- In the Property View adjust these properties of the bevel gear:
- Set the Datamodule property to
2.5 mm. - Set the Dataheight property to
15 mm.
- Set the Datamodule property to
- Press the
Recompute button to see the changes.
- invoke
PartDesign Boolean Operation.
- The Boolean Parameters dialog opens in the Task Panel:
- Press the Add Body button
- Select the revolution object 1 (Body003).
- Press the Add Body button again to finish the selection.
- Select Common from the options below the list.
- Press the OK button to shut the dialog and finish the operation.
- The shape of bevel gear 1 is finished.
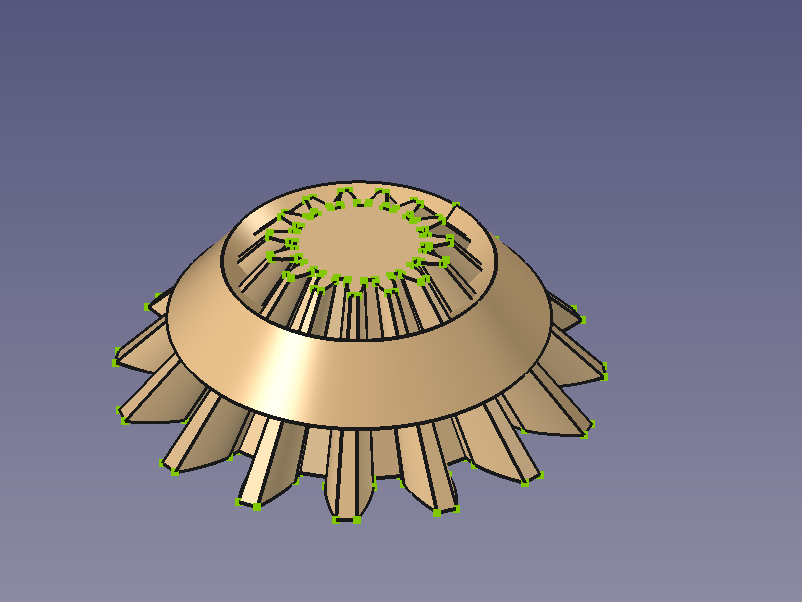
Left: Enlarged raw bevel gear 1 and revolution object 1. Right: Resulting finished bevel gear 1
Bevel Gear 2
- Activate bevel gear 2 (Body002).
- In the Property View adjust these properties of the bevel gear:
- Set the Datamodule property to
2.5 mm. - Set the Dataheight property to
15 mm.
- Set the Datamodule property to
- Press the
Recompute button to see the changes.
- Invoke
PartDesign Boolean Operation.
- The Boolean Parameters dialog opens in the Task Panel:
- Press the Add Body button
- Select the revolution object 2 (Body004).
- Press the Add Body button again to finish the selection.
- Select Common from the options below the list.
- Press the OK button to shut the dialog and finish the operation.
- The shape of bevel gear 2 is finished.
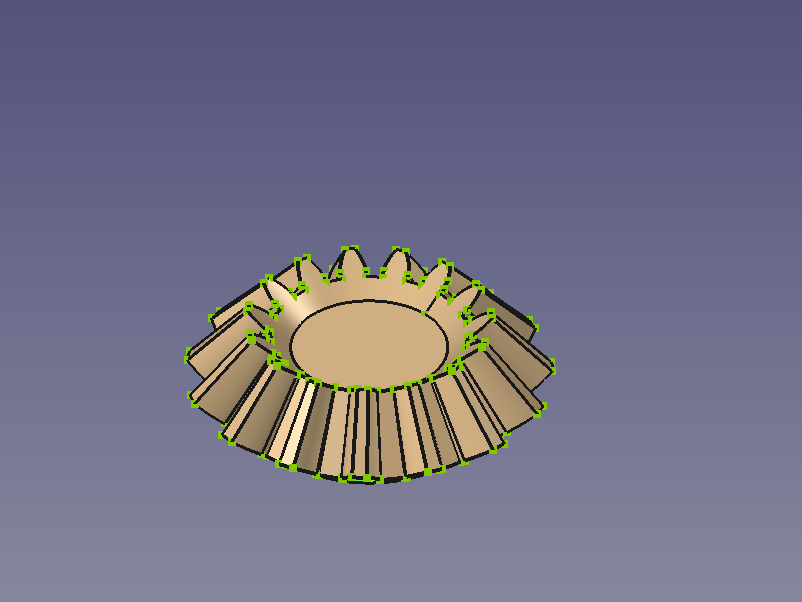
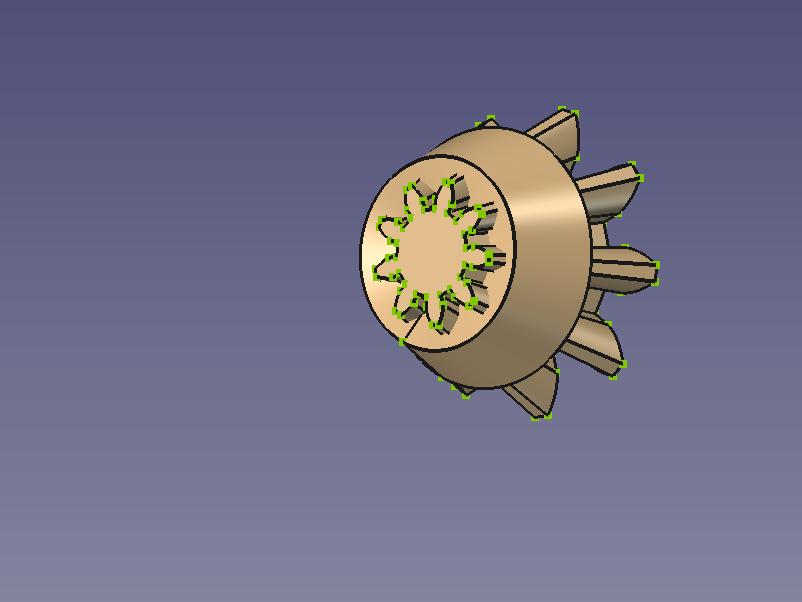
Left: Enlarged raw bevel gear 2 and revolution object 2. Right: Resulting finished bevel gear 2
Missing Features
To pair two gears we usually use the pitch circle, or we could optionally use the apex in connection with the axis, but the problem is that neither the pitch circle nor the apex is represented by a geometric element of the final shape and thus cannot be selected directly. To position the gears in an assembly we have to add/use selectable auxiliary geometry that can be shown/hidden on demand, or use existing shape elements that have a known offset from the pitch circle/apex and enter an offset value manually.
What is Left to do?
Now we have two decent bevel gears but they cannot be mounted to axles or shafts, They have to be extended with some shape elements, either cylindric ones for bearings to be able to rotate around an axle, or prismatic ones to be able to transmit torque into a shaft.
Such additions are quite simple to model so that they are not covered by this tutorial.
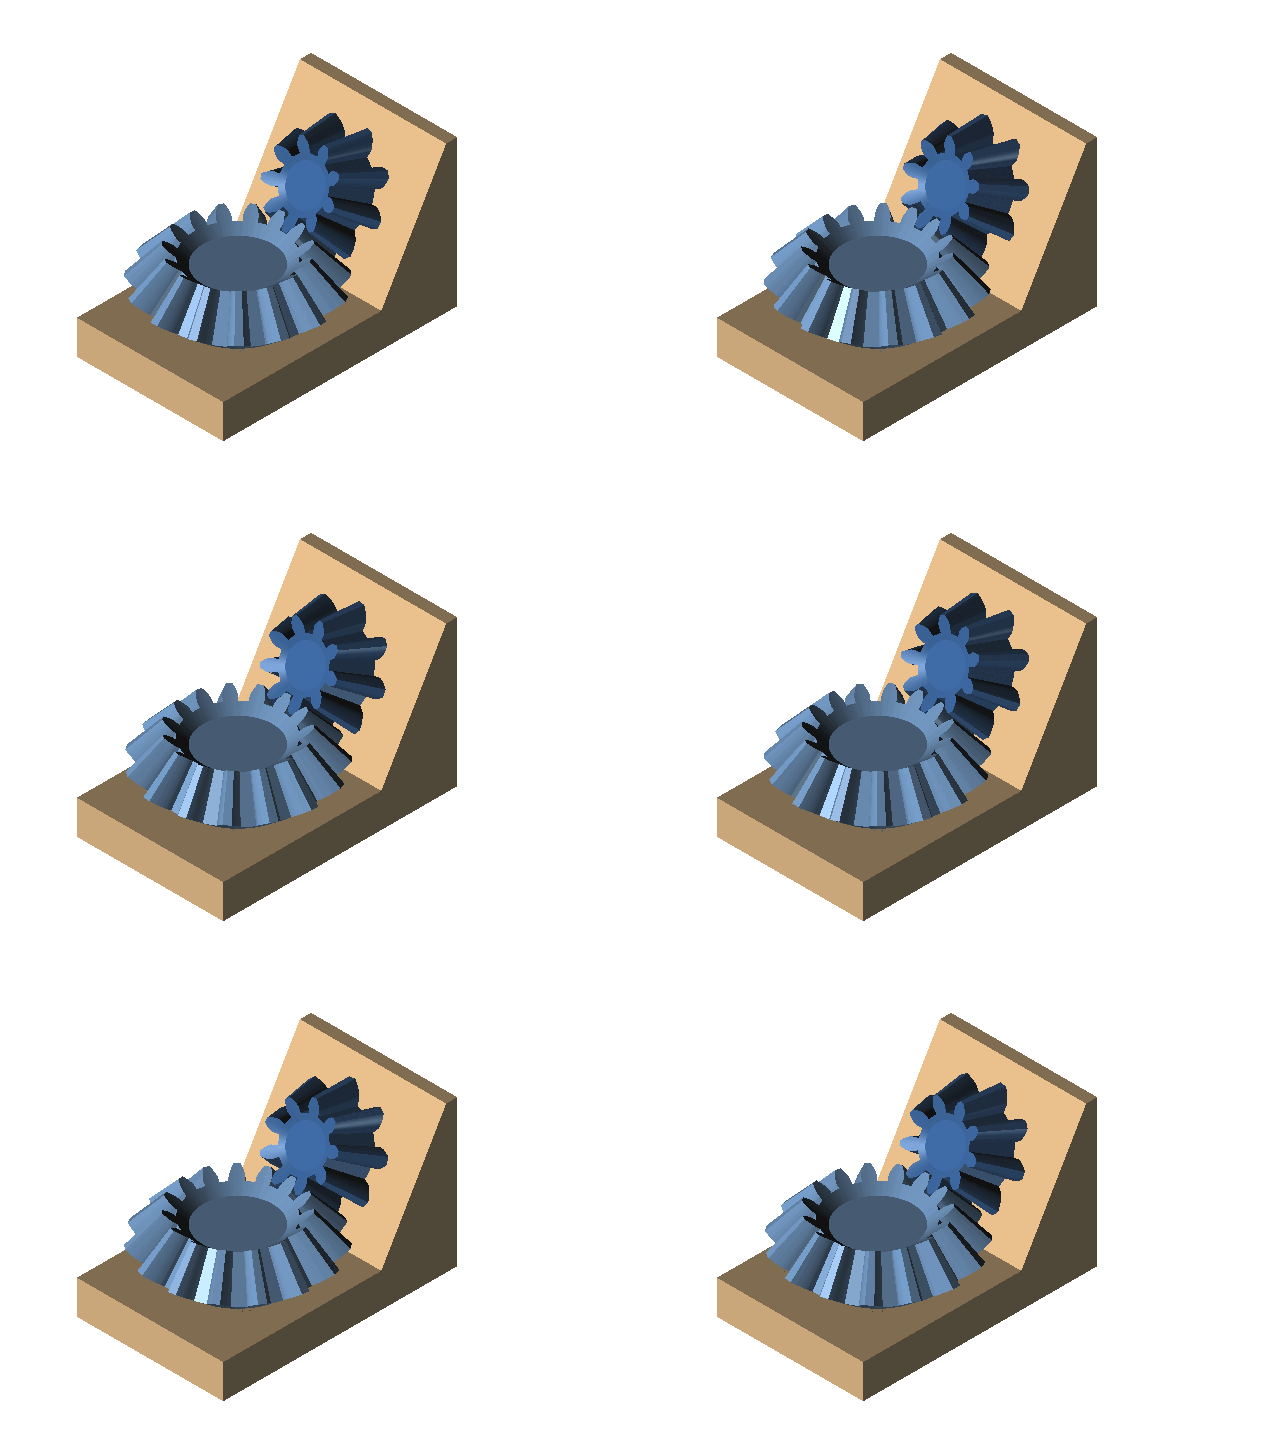
We could add a support object and create an animated assembly, but this as well is another topic for another tutorial.

