Tutorial Render with Blender/ja
| Topic |
|---|
| レンダリング |
| Level |
| 中級 |
| Time to complete |
| 60分 |
| Authors |
| vocx |
| FreeCAD version |
| 第0.18版以降 |
| Example files |
| なし |
| See also |
| None |
概要
このチュートリアルでは、Blenderを使って、FreeCADで作成したパーツやアセンブリからレンダリング画像を作成する方法を紹介します。ユーザは既にFreeCADでパーツを作成あるいはインポートし終えている状態から始めて、それをレンダリングのためのBlenderにエクスポートします。
Bleander 2.80のEEVEEまたはCyclesエンジンを使ってレンダリング画像を生成します。以下では、FreeCADおよびBlenderの両方で、より早く作業を進めるために使うことのできるPythonコマンドについても示します。
Joko Engineeringによる一連の動画「 Render Solidworks and FreeCAD Models in Blender」で、同様の手順について説明しています。
FreeCAD
1. PartワークベンチまたはPartDesignワークベンチで作った部品からなるアセンブリ、または、例えばArchワークベンチなどを使って、ソリッドなモデルを作成します。最終的なレンダリング画像でほしいものと概ね合致した色や材質を、個々の部品に設定します。
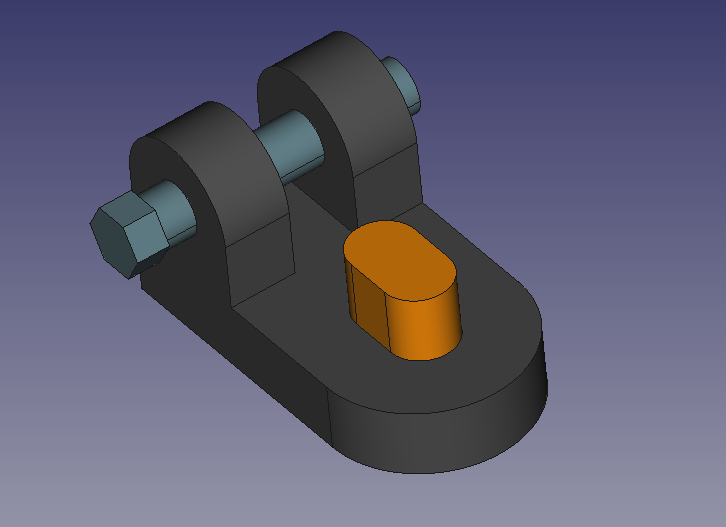
FreeCADで作成し、色及び材質を設定したアセンブリの例
2. もしモデルが非常に精細なものの場合は、物体のビューDeviationを0.1から0.01の間、あるいはさらにそれよりも小さな値にします。小さな値を設定すると、エクスポートするメッシュがより細かくなり、レンダリング結果もより高品質になります。
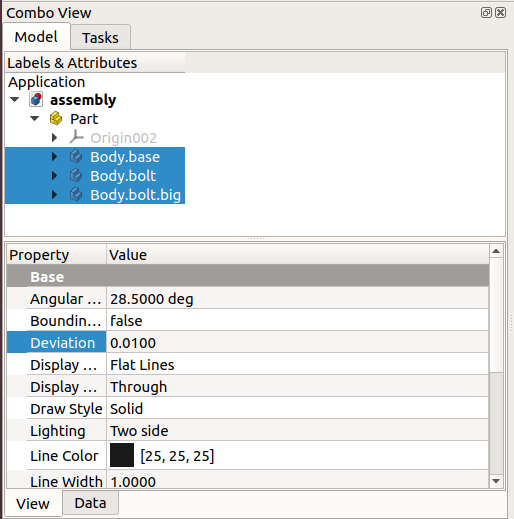
FreeCADで作成した部品のDeviationプロパティー。十分な解像度を持たせるためには、この値を小さくする必要がります。
3. Partを選択してから、ファイル → エクスポートまたはCtrl+Eで、Wavefront OBJ形式のファイルにエクスポートします。
あるいは、Pythonコンソールからコマンドを入力してエクスポートすることも可能です。エクスポートするオブジェクトのリストを定義してから、エクスポートのための関数をファイル名を与えて呼び出します。
import importOBJ
objs = FreeCAD.ActiveDocument.getObjectsByLabel("Part")[0]

importOBJ.export(objs, "/home/user/assembly.obj")
注意:OBJにエスクポートすると、ファイルが2つ作られます。1つ目のファイル(例えばassembly.obj)にはメッシュの情報が入っています。2つ目のファイル(例えばassembly.mtl)には材質の情報(ほとんどの場合は色の情報)が入っています。
注意2:もしOBJファイルが空の場合は、個々のボディーを個別にエクスポートする必要があります。この場合は、Partの下の個々のボディーを選択し、個別にエクスポートしてください。
import importOBJ
objs = [FreeCAD.ActiveDocument.getObjectsByLabel("Body.base")[0],
FreeCAD.ActiveDocument.getObjectsByLabel("Body.bolt")[0],
FreeCAD.ActiveDocument.getObjectsByLabel("Body.bolt.big")[0]]

importOBJ.export(objs, "/home/user/assembly.obj")
Blender
モデルの準備
4. Blenderを開きます。Shift+F4を押して、タイムラインパネルをPythonコンソールに切り替えておきます。こうしておくと、コマンドを入力して結果を確認するのが簡単になります。このパネルを分割し、片側をコンソールに、もう片方を情報パネルにしてもいいでしょう。こうすると、GUI上の操作に対応するPythonコードを確認することができます。
EEVEEエンジンを使っていることを確認してください。プロパティパネルのレンダーの中のレンダーエンジンをEeveeにしてくだい。
bpy.context.scene.render.engine = 'BLENDER_EEVEE'
5. メニューからファイル → インポート → Wavefront (.obj)を選んでモデルをインポートします。
あるいは、Pythonコンソールにコマンドを入力することでインポートすることもできます。
obj_file = "/home/user/assembly.obj"
bpy.ops.import_scene.obj(filepath=obj_file)
6. 縮尺を変えます。
もしボディーが非常に大きく見える場合は、単位を変更し適切な縮尺で表示されるようにする必要があるかもしれません。
プロパティパネルのシーンの中の単位で、単位系Unit Systemあるいは単位の倍率あるいは長さを適切に設定します。
小さいものの場合は、長さをミリメートルにするのがいいでしょう。建物のモデルと言った大きいものの場合は長さをメートルに倍率を0.001にするのがいいでしょう。適切な倍率をいろいろと試してみてください。
これもPythonコンソールから変更できます。
bpy.context.scene.unit_settings.length_unit = 'MILLIMETERS'
# or bpy.context.scene.unit_settings.length_unit = 'METERS'
bpy.context.scene.unit_settings.scale_length = 0.001
Note: changing the scale and units of the scene is only necessary if you wish to work with objects at their true dimensions. If you just want to render your scene quickly, you may omit any adjustment.
6.1. If you zoom out, and the view cuts the imported parts, you may have to adjust the view clip values.
Hit N to show the auxiliary panel; go to the View section and set the End to a large value, for example, 1E6 mm or 1000 m.
6.2. If you wish, also adjust the size of the grid; go to Overlays, then Guides, and set the Scale of the grid to 0.001.
7. Fix the rotation of the objects.
When imported, objects may appear rotated around one of the axes, for example, 90 degrees around the X axis.
Hit N to show the auxiliary panel; select an object, go to the Transform section and set the Rotation to 0° in each field. Do this for every object.
This can be automated by a small script that just sets the rotation of each imported body to zero, with the exception of the objects inside the fixed_objs tuple. This can be useful if you are importing objects into an existing scene where other objects are already in their right positions.
fixed_objs = ('Camera', 'Cube', 'Light')

for obj in bpy.data.objects:
    if any(s for s in fixed_objs if s in obj.name):
        print('%s %s  [[No change]]' % (obj.name, obj.rotation_euler))
        continue
    else:
        obj.rotation_euler = (0, 0, 0)
        print('%s %s  ... rotated' % (obj.name, obj.rotation_euler))
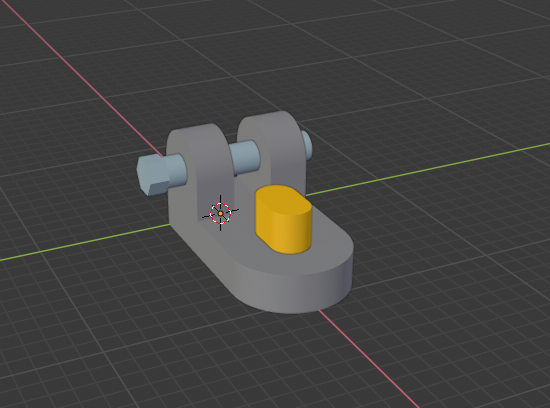
Assembly created in FreeCAD imported into Blender; the model was rotated and the units for the scene were adjusted to match the imported objects.
シーンのカメラを準備する
8. Set the camera in the right position.
Adjust the viewport to look at the model in the desired orientation, then hit Ctrl+Alt+0 (numerical pad), or use the menu View → Align View → Align Active Camera to View.
8.1. If you don't see anything in the camera view, you may need to adjust the clipping. Selecting the camera in the Outliner, go to the Properties panel, then Object Data, then Lens, then set the Clip End to a large value, for example, 1E3 mm or 1000 m.
bpy.context.object.data.clip_end = 1e+03
If you can see the object through the camera view, now you can quickly render the model by pressing F12, which will open the Image Editor with the result. Press Esc to exit, and return to the 3D Viewport.
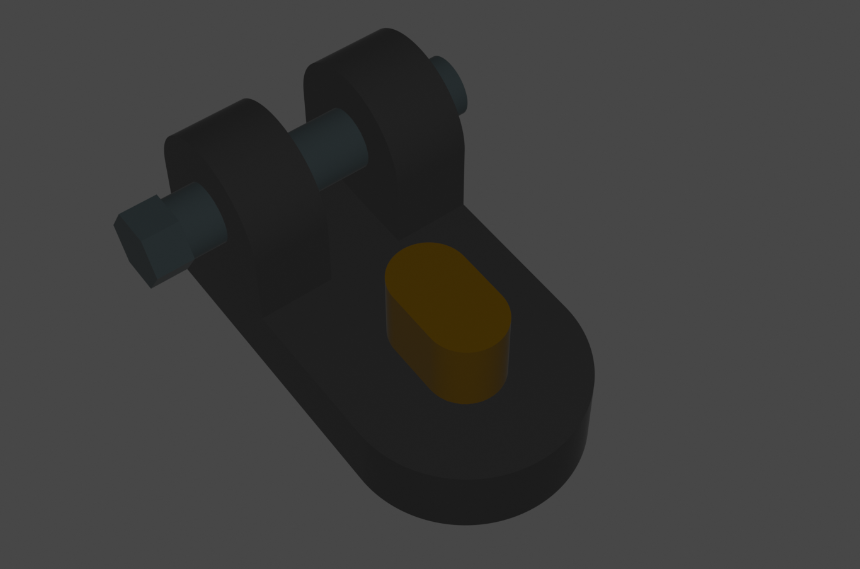
First render of the assembly in Blender, with the camera with correct clipping but no lighting
You can toggle between camera view and the 3D viewport by pressing 0 in the numerical pad; pressing F12 will render the camera view in any moment.
8.2. If the camera looks very small in the 3D viewport, go to the Properties panel, then Object Data, then Viewport Display, and set a larger value for the Size, for example, 20 mm. Also activate the Limits checkbox to see the clipping distance of the camera.
bpy.context.object.data.display_size = 20
bpy.context.object.data.show_limits = True
シーンの照明を準備する
9. Select the light in the Outliner, go to the Properties panel, then Object Data, then press on Sun, and set the Strength to 5.0.
bpy.context.object.data.type = 'SUN'
bpy.context.object.data.energy = 5
This will turn the light into a Sun lamp. This type of lamp emits an infinite number of parallel light rays that all arrive to the scene with a fixed angle.
You may position the Sun lamp anywhere on the viewport above your model so that you define the direction of the rays of light. For a Sun lamp it doesn't matter how close or far you place the lamp, only the direction of the rays, which are defined by the rotation of the Light object.
bpy.context.active_object.location = (150, 100, 100)
bpy.context.active_object.rotation_euler = (0.6, 0.05, 1.88)
Press F12 again to see a preliminary render of the model.
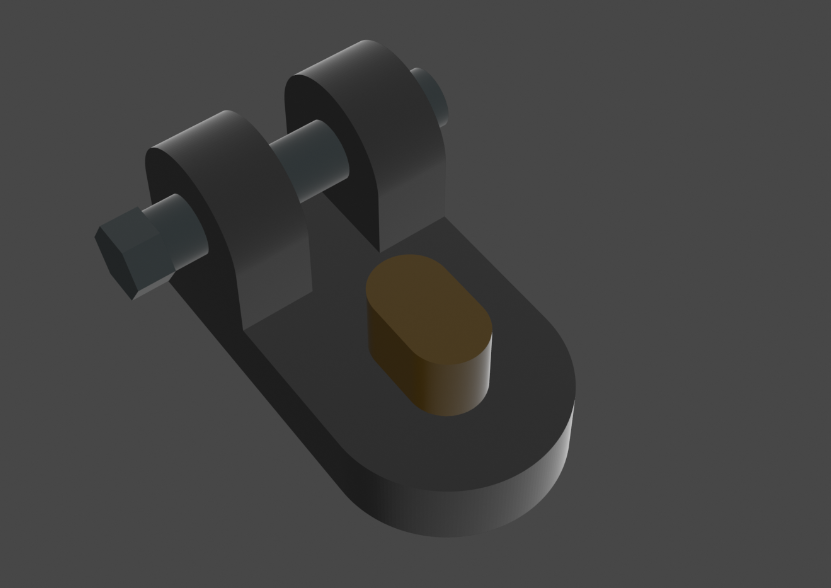
Render of the assembly in Blender with a Sun lamp added that emits parallel light rays with a fixed angle
More setup: floor, global lighting, reflections, and soft shadows
10. Add a floor plane. Press Shift+A then choose Mesh, Plane, and give it dimensions about 10 times larger than your model. This mesh object will serve as a floor plane or table top on which the model is standing. Also move the plane a bit down so that it does not intersect the model; -1 mm below the object is enough.
bpy.ops.mesh.primitive_plane_add(size=1500, view_align=False, enter_editmode=False, location=(0, 0, -1))
11. Set the world illumination. In the Properties panel go to World, and set Color to a light blue-gray value, RGB (0.358, 0.512, 0.527), and set the Strength to 0.3.
12. Set reflections and shadows. The EEVEE renderer of Blender produces fast renders by deactivating most effects initially. In order to obtain better images, some options need to be made active.
Go to the Properties panel, then Render, and check Screen Space Reflections. In the Shadows section, also check Soft Shadows.
bpy.context.scene.eevee.use_ssr = True
bpy.context.scene.eevee.use_soft_shadows = True
Set the materials of the objects
13. Turn the Python Console panel into a Shader Editor panel (Shift+F3).
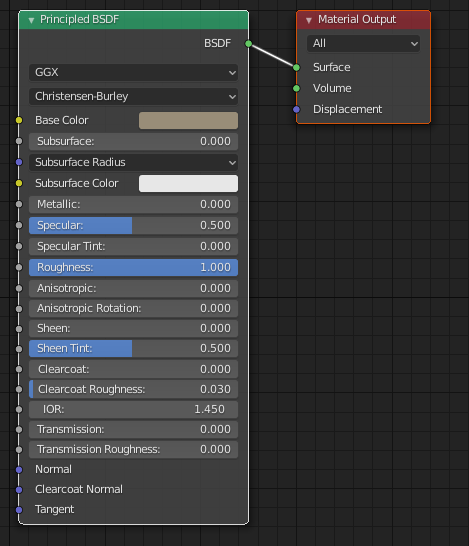
13.1. Select the ground plane, go to the Properties panel, then Material, and click on New. In the Shader Editor a Principled BSDF node should appear. Give it a beige Base Color RGB (0.318, 0.267, 0.187), turn the Metallic slider to 0.000, and the Roughness to 1.000.
Principled BSDF shader used in Blender to simulate a variety of materials ranging from shiny metals to rough and opaque solids.
13.2. Select each of the parts of the model, and adjust the respective Principled BSDF material node. For metallic parts, turn the Metallic property all the way to 1.000. Adjust the value of Roughness to be between 0.2 and 0.7. The closer to 0.000 the Roughness is, the more reflective (mirror-like) it will appear.
For non metals, like plastics, wood and textiles, set the Metallic slider all the way to 0.000, and adjust the value of Roughness to between 0.4 and 1.0.
In general, metals are naturally smooth and therefore their roughness value is small, making them very reflective (shiny). Other materials are microscopically rough, and therefore do not reflect as much light, making them opaque.
14. Test different combinations of materials until they look acceptable. Press Z and then 8 (numerical pad) to enter Rendered mode; in this mode, the EEVEE renderer shows in real time in the 3D viewport how the final image will look like. Use Z to open the pie menu and switch back to Solid mode (Z 6), or go to LookDev mode (Z 2), a mode which adds different types of lighting to the scene to test the appearance of the materials.
Press F12 to render the view through the camera and check the quality of the image.
Rendering and saving
15. If your model looks reasonably well with the EEVEE renderer you can already save the image by going to Image → Save As or pressing Shift+S in the Image Editor.
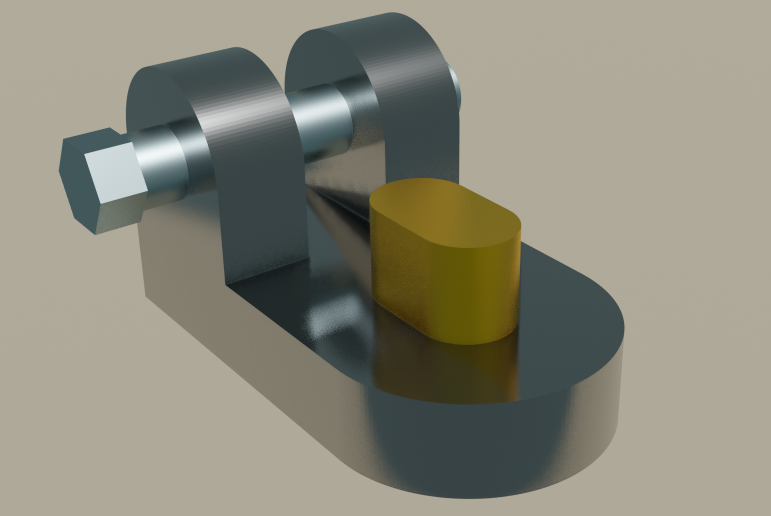
Rendered assembly produced with Blender EEVEE; all materials use the Principled BSDF shader; only one Sun lamp is used, with some ambient background light.
16. If you want to improve the quality of the image, try the Cycles renderer.
Go to the Properties panel, then Render, and for Render Engine select Cycles. With the Cycles renderer, Blender will refine the image gradually until a number of iterations have passed. Every time the viewport changes the recalculation restarts.
bpy.context.scene.render.engine = 'CYCLES'
16.1. Adjust the sampling rate. Go to the Properties panel, then Render, then in the Sampling section select an appropriate number for Render and Viewport.
For the Viewport a small number of samples, in the range of 32 to 128, is generally enough to obtain a good preview of the image. For the final image, set Render to a higher number, from 128 to 2000, depending on the complexity and amount of details on the scene.
Press F12 to render the final view through the camera. Depending on your graphics card (GPU) the image should take several more seconds, or minutes, to render with Cycles than with EEVEE, but the quality of the image should be better.
17. When you are satisfied with the quality of the rendering, in the Image Editor go to Image → Save As or press Shift+S.
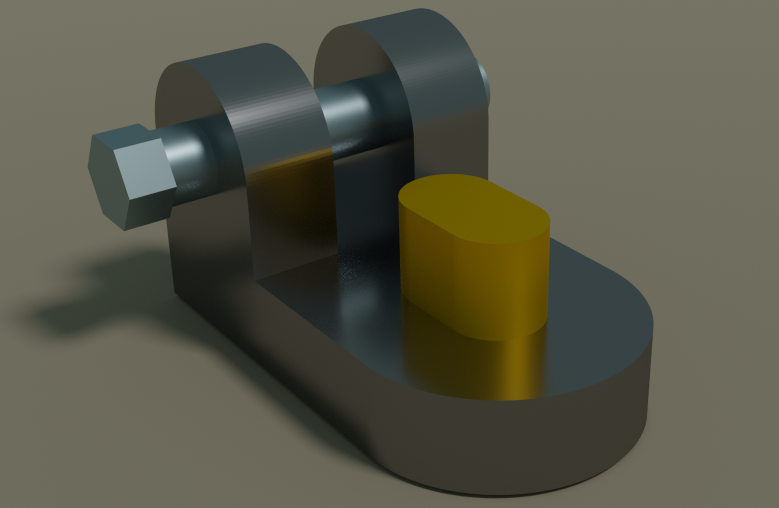
Rendered assembly produced with Blender Cycles; all options, materials, and lights that were used with EEVEE were kept for use with Cycles.
Rendering from the command line
18. If the scene has been completely finished, you may wish to render from outside Blender, from the operating system's command line. This can be useful to batch render different scenes in a remote system. Both EEVEE and Cycles are supported.
blender -b assembly.blend -E BLENDER_EEVEE -o //assembly_EEVEE_#### -t 3 -F PNG -x 1 -f 1
blender -b assembly.blend -E CYCLES -o //assembly_CYCLES_#### -t 3 -F PNG -x 1 -f 1
This specifies that rendering should happen in the background with -b; the rendering engine is chosen with -E; the output filename is selected with -o; the double forward slash // indicates a path relative to the input file; the hash mark # is used to indicate the frame number, padded with zeroes if necessary, for example, 0001; the number of CPU threads used in rendering is chosen with -t 3; the output file format is indicated with -F, and the -x 1 option adds automatically the extension to the name; the final option is -f 1 which indicates that only the first frame will be rendered, which is the normal case for a static scene; for animations use the -a switch to produce an image for each frame, which can then be assembled to produce a video file.
Importing plugin
Creating the intermediate Wavefront mesh (.obj) and then importing it into Blender will work in most situations. However, there is also the option of importing the FreeCAD file (.FCStd) directly into Blender by means of a plugin.
- io_import_fcstd.py, original version for Blender 2.79
- FreeCAD .FCStd importer for Blender 2.80
This is a Blender plugin; for it to work, Blender needs to be able to import FreeCAD as a module from the Python Console.
import FreeCAD
This is only possible if both Blender and FreeCAD are compiled against the same pythonX.Y (major and minor) version. For example, if Blender is compiled against Python 3.7, FreeCAD must be compiled against a Python 3.7 version as well. If FreeCAD is compiled against another version, for example, Python 2.7.15 or Python 3.6.7, the plugin will not work. The micro version number (third number) does not matter, that is, the plugin should work if one software is compiled against Python 3.7.5 and the other against Python 3.7.8.
In addition, the FreeCAD precompiled Python module, FreeCAD.so on Linux and FreeCAD.pyd on Windows, should be in the Python path used by Blender to import modules. This path can be set up in different ways, depending on the operating system and Python distribution.
In Blender you can see all paths searched by inspecting the sys.path variable. The FreeCAD module should be found in any of those directories.
import sys
print(sys.path)
- A copy or symbolic link inside one of those directories could be created pointing to the FreeCAD module.
ln -s /usr/lib/freecad/lib/FreeCAD.so $HOME/.config/blender/2.80/scripts/addons

ln -s /usr/lib/freecad/lib/FreeCAD.so $HOME/.local/lib/python3.7/site-packages
- Another possibility is adding the module directly into the path inside Blender.
import sys
sys.path.append("/usr/lib/freecad/lib/FreeCAD.so")
Final notes
EEVEE is not a physically accurate renderer, however its main strength is that it is a real time engine so it is able to produce quick renderings directly in the 3D viewport. In many cases these images have enough quality for final production, which means it is possible to obtain a good result in a very short time. In cases where complex light interactions are desired (reflections, refractions, volumetric light, and caustics) EEVEE is more limited, and requires some options and tricks to work around some of these limitations.
On the other hand, Cycles is a true raytracing renderer which means it is more accurate at calculating light paths in a scene. Cycles is the recommended renderer when the best quality is desired (photorealistic results), at the cost of more rendering time.
Both renderers can be used to leverage the advantages of each. In many cases the scene can be quickly prepared and tested with EEVEE to obtain preliminary renderings; then the same scene can be used with minor changes with Cycles in order to produce a higher quality, final rendering. In particular, when a scene that was setup with EEVEE will be used with Cycles, the lights may need to be adjusted in value and position as both renderers treat light in different ways.
Obtaining good results is highly dependent on the rendering options, the materials, and the lighting. The Principled BSDF material shader is a generic solution that works well for many cases, however, to produce truly photorealistic results, the use of texture maps and normal maps, along with careful lighting of the scene is still very important.
- はじめてみよう
- インストール: ダウンロード、Windowsへのインストール、Linuxへのインストール、Macへのインストール、付加機能のインストール、Dockerでのコンパイル、AppImage、Ubuntu Snap
- 基本: FreeCADについて、ユーザー・インタフェース、Mマウス・ナビゲーション、オブジェクトの選択方法、オブジェクトの名前、設定、ワークベンチ、FreeCADファイルの構造、プロパティ、FreeCADへの貢献、寄付
- ヘルプ: チュートリアル、チュートリアル動画
- ワークベンチ: 共通ツール、アセンブリー、BIM、CAM、ドラフト、FEM、インスペクション、マテリアル、メッシュ、OpenSCAD、 パート、パートデザイン、ポイント、リバースエンジニアリング、ロボット、スケッチャー、スプレッドシート、サーフェス、テックドロー、テストフレームワーク
- 情報ハブ: ユーザー向けハブ、パワーユーザー向けハブ、開発者向けハブ
