Raytracing tutorial/ru
Верстак Raytracing (Отрисовка)
The Raytracing workbench is being superseded by the new Render Workbench, which is intended as its replacement. The Render Workbench can be installed through the Addon Manager. The information here is provided because by default FreeCAD is still shipped (as of 0.19-24276) with the Raytracing Workbench, and because the new module should basically work in the same way
| Тема |
|---|
| Raytracing |
| Уровень |
| Beginner |
| Время для завершения |
| 10 minutes + Render time |
| Авторы |
| Drei |
| FreeCAD версия |
| 0.16 or above |
| Примеры файлов |
| Смотрите также |
| None |
Введение
This tutorial is meant to introduce the reader to the basic workflow of the Raytracing Workbench, as well as most of the tools that are available to create a rendered image. Note that the Raytracing workbench is progressively being obsoleted in favor of the newer Render Workbench, available via the Addons Manager
Requirements
- FreeCAD version 0.16 or above
- POV-Ray and/or LuxRender is installed on the system
- In the case of POV-Ray, it's not enough to have just the binary executable in place, but it also requires the installation of supporting files. In Ubuntu, these are provided by the Recommends-flagged package povray-includes. Potential issues have also been seen with Linux installations requiring local configuration files to be manually created in a user's home folder, as discussed here.
- In the case of POV-Ray, installation of psicofil's macro is recommended
- The reader has the basic knowledge to use the Part and PartDesign Workbenches
Procedure
Modeling
In this example a Cube is used as the study object, but models created in the Part or PartDesign Workbenches can be used instead.
- Create a new document
- Activate the Part Workbench
- Create a Cube. You are free to change its properties in any way.
Now we have a model with which to work.
Preparing for the render
- Switch to the Raytracing Workbench
- Change your View to Perspective. Go to View menu and select Perspective.
- Set the location for the renderer. Go to the Edit menu and select Preferences. Click on Raytracing and set the location to the executable.
- Set the size of the rendered image. Go to the Edit menu and select Preferences. Click on Raytracing and set the desired image size.
POV-Ray
- Select
New PovRay project. From the dropdown menu pick RadiosityNormal
LuxRender
- Select
New LuxRender project. From the dropdown menu pick LuxClassic
Setting the camera position
- Position the 3D View to the desired location and distance from the model. In this case we will use the Axonometric View.
- Select the Project Folder from the Tree View
- Select
Reset camera
Importing the model
- Select the model to render.
- Select
Insert part
Running the Renderer
- Select
Render.
- Set the path to which the image will be stored.
- Wait for the rendering to finish. This may take a while.
Viewing the results
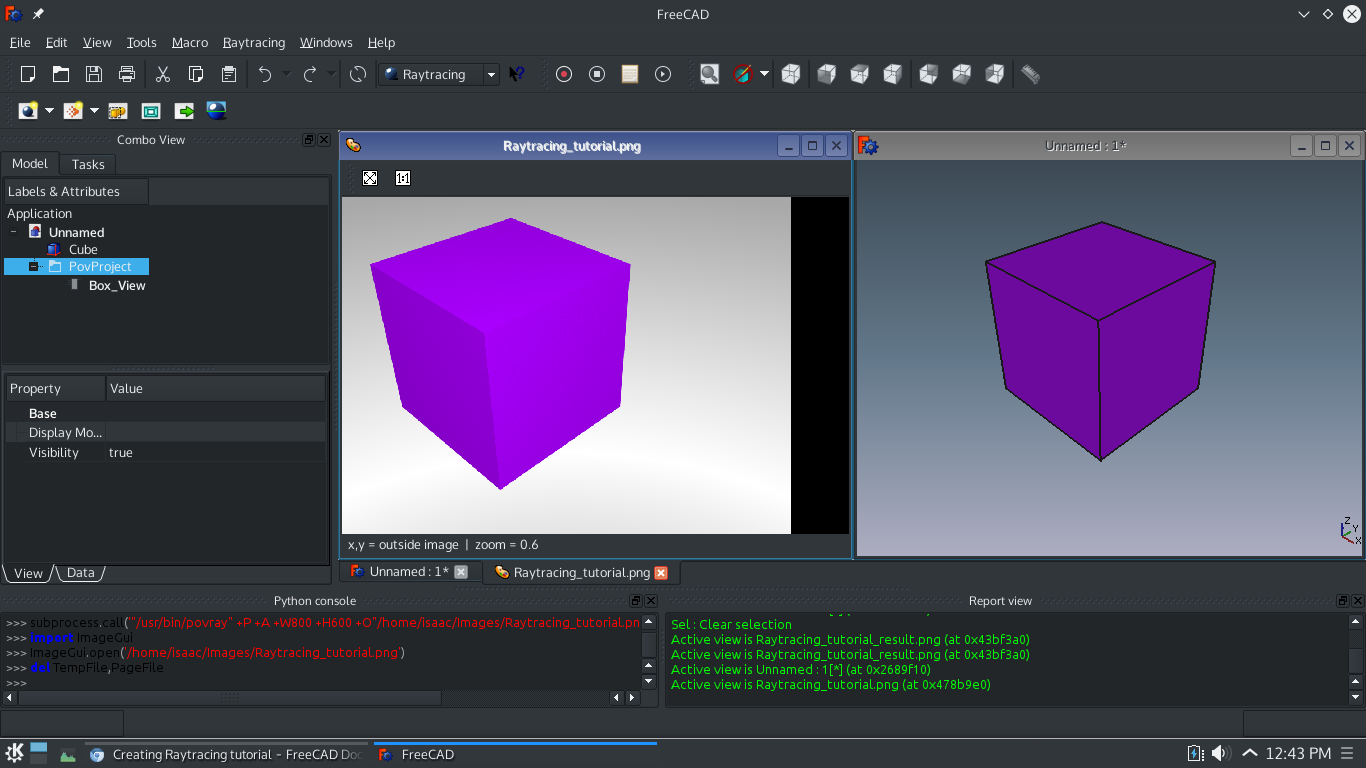
FreeCAD will immediately open the image after the render is finished.
We are now finished with the basic workflow for the Raytracing workbench.
- Начинающим
- Установка: Загрузка, Windows, Linux, Mac, Дополнительных компонентов, Docker, AppImage, Ubuntu Snap
- Базовая: О FreeCAD, Интерфейс, Навигация мыши, Методы выделения, Имя объекта, Настройки, Верстаки, Структура документа, Свойства, Помоги FreeCAD, Пожертвования
- Помощь: Учебники, Видео учебники
- Верстаки: Std Base, Arch, Assembly, CAM, Draft, FEM, Inspection, Mesh, OpenSCAD, Part, PartDesign, Points, Reverse Engineering, Robot, Sketcher, Spreadsheet, Surface, TechDraw, Test Framework
