PartDesign Draft/tr
This documentation is not finished. Please help and contribute documentation.
GuiCommand model explains how commands should be documented. Browse Category:UnfinishedDocu to see more incomplete pages like this one. See Category:Command Reference for all commands.
See WikiPages to learn about editing the wiki pages, and go to Help FreeCAD to learn about other ways in which you can contribute.
|
Taslak |
| Menü konumu |
|---|
| Parça Tasarım → Taslak |
| Tezgahlar |
| Parça tasarım |
| Varsayılan kısayol |
| None |
| Versiyonda tanıtıldı |
| - |
| Ayrıca bkz |
| None |
Description
Tanım
Cube with draft applied
Usage
Add a draft
- Remember:
- Since there must be at least one face for the feature, the last remaining face in the list cannot be removed.
Edit a draft
- Do one of the following:
- The Draft Parameters task panel opens. See Options for more information.
- Press the OK button to finish.
Options
- Add face: Add faces to the selection by pressing the Add face button and selecting more faces.
- Remove face: Choose a way to remove faces from the selection:
- Select one or more faces in the list and press the Del key or right-click the list and select Remove from the context menu.
- Press the Remove face button. All previously selected faces are highlighted in purple. Select each face to be removed.
- Draft angle: Set the Draft angle either by entering a value or by clicking the up/down arrows.
- Neutral plane: Set the the neutral plane by pressing the Neutral plane button and selecting the plane that must not change dimensionally.
- Pull direction: Set the the pull direction by pressing the Pull direction button, then select an edge. Pull Direction is only effective if the Neutral Plane has been set. Results can be unpredictable.
- Reverse pull direction: Invert the pull direction by checking the Reverse pull direction checkbox. This will toggle the draft between positive and negative angles.
Notes
- The Draft tool will only work on faces that are not tangentially connected to other faces. A common mistake is to attempt to apply draft to a face that already has a fillet applied to it. To solve this, remove the fillet, apply the draft as needed, then re-apply the fillet.
- As explained in the OCC documentation, a face selected for Draft is tapered by inclining it through the specified Draft angle about the line of intersection between the Neutral plane and the selected face. Pull direction indicates the side of the Neutral plane from which material is removed if Draft angle is positive or added if Draft angle is negative. This also implies that Pull direction should be perpendicular to the Neutral plane and has analogous role to the Reverse pull direction checkbox.
Properties
See also: Property View.
A PartDesign Draft object is derived from a Part Feature object and inherits all its properties. It also has the following additional properties:
Data
Base
- VeriAngle (
Angle): Cannot be negative. Default:1.5 °. - VeriReversed (
Bool): Default:false. - VeriBase (
LinkSub): Sub-link to the parent feature's list of selected edges and faces. - VeriSupport Transform (
Bool): Include the base additive/subtractive shape when used in pattern features. If disabled, only the dressed part of the shape is used for patterning. Default:false. - Veri (hidden)Add Sub Shape (
PartShape) - Veri (hidden)Base Feature (
Link): Link to the parent feature. - Veri (hidden)_ Body (
LinkHidden): Link to the parent body.
Draft
- VeriNeutral Plane (
LinkSub): Sub-link to the parent feature's list containing the neutral plane. - VeriPull Direction (
LinkSub)
Part Design
- VeriRefine (
Bool): Refine shape (clean up redundant edges) after adding/subtracting. The default value is determined by the Automatically refine model after sketch-based operation preference. See PartDesign Preferences.
Example
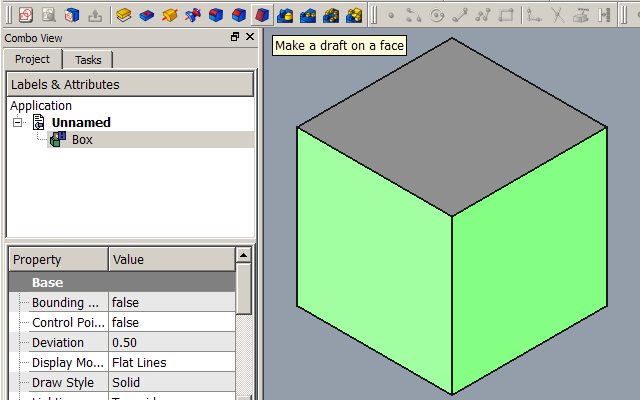
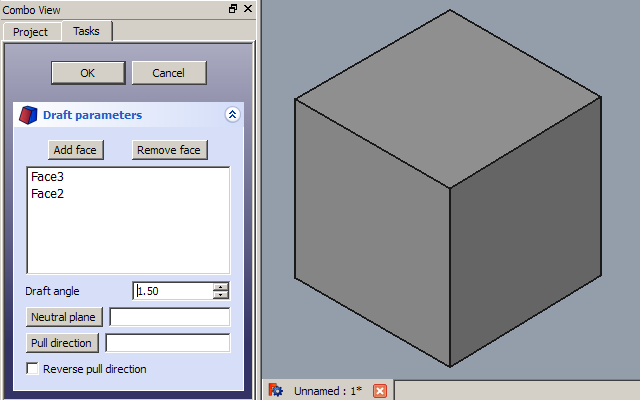
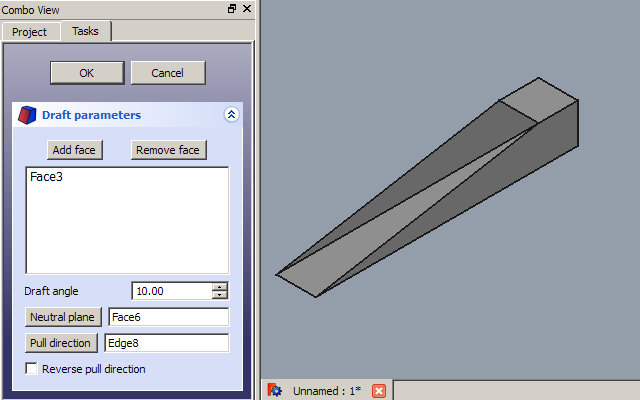
Select one or more faces of the object before starting the tool. Here, 2 faces have been selected.
Showing Draft Parameters in TaskPanel.
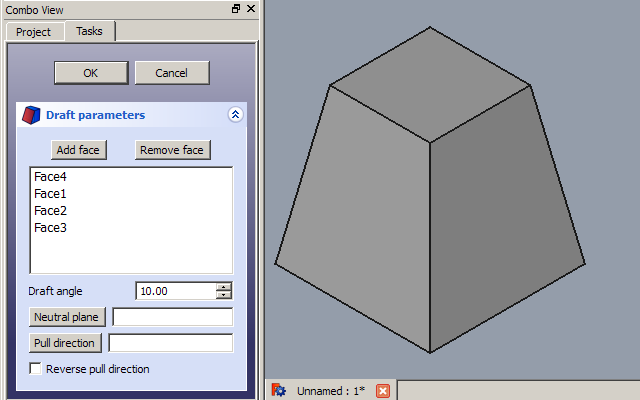
Two faces have been added, and a 10 deg. draft applied. The bottom plane has remained dimensionally stable, while the draft has made the top plane smaller.
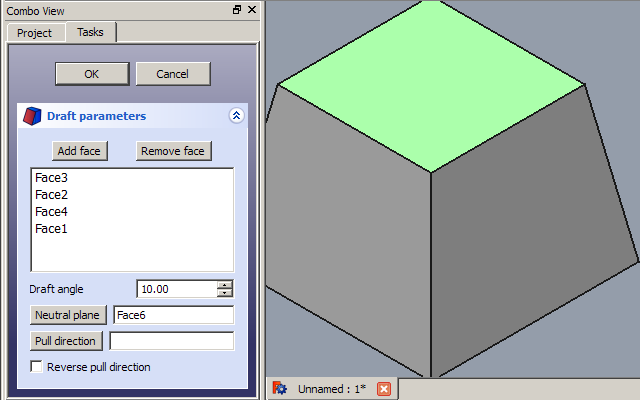
The Neutral Plane has been changed to the top. Now, the top plane has stayed dimensionally stable, while the draft has made the bottom plane larger.
Pull direction is set to the lower right edge, resulting in the draft pulling to the left.
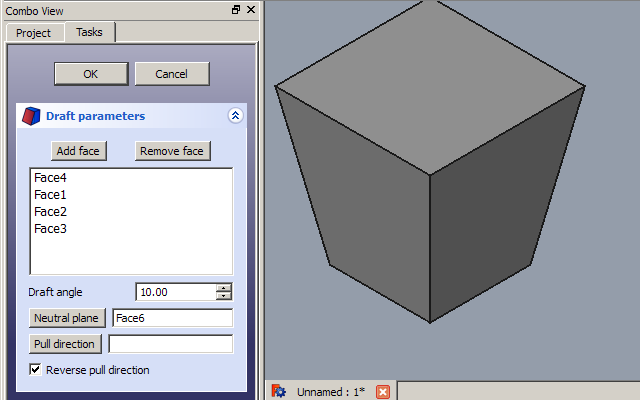
Checking the Reverse Direction box has applied an inward draft rather than outward.
- Helper tools: New Body, New Sketch, Attach Sketch, Edit Sketch, Validate Sketch, Check Geometry, Sub-Shape Binder, Clone
- Modeling tools:
- Additive tools: Pad, Revolution, Additive Loft, Additive Pipe, Additive Helix, Additive Box, Additive Cylinder, Additive Sphere, Additive Cone, Additive Ellipsoid, Additive Torus, Additive Prism, Additive Wedge
- Subtractive tools: Pocket, Hole, Groove, Subtractive Loft, Subtractive Pipe, Subtractive Helix, Subtractive Box, Subtractive Cylinder, Subtractive Sphere, Subtractive Cone, Subtractive Ellipsoid, Subtractive Torus, Subtractive Prism, Subtractive Wedge
- Boolean: Boolean Operation
- Dress-up tools: Fillet, Chamfer, Draft, Thickness
- Transformation tools: Mirror, Linear Pattern, Polar Pattern, Multi-Transform, Scale
- Additional tools: Shape Binder, Involute Gear, Sprocket, Shaft Design Wizard
- Context menu: Suppressed, Set Tip, Move Object To…, Move Feature After…
- Preferences: Preferences, Fine tuning
- Getting started
- Installation: Download, Windows, Linux, Mac, Additional components, Docker, AppImage, Ubuntu Snap
- Basics: About FreeCAD, Interface, Mouse navigation, Selection methods, Object name, Preferences, Workbenches, Document structure, Properties, Help FreeCAD, Donate
- Help: Tutorials, Video tutorials
- Workbenches: Std Base, Assembly, BIM, CAM, Draft, FEM, Inspection, Material, Mesh, OpenSCAD, Part, PartDesign, Points, Reverse Engineering, Robot, Sketcher, Spreadsheet, Surface, TechDraw, Test Framework
- Hubs: User hub, Power users hub, Developer hub
